
JTAG (Joint Test Action Group) pins are essential for debugging and programming microcontrollers, especially in IoT devices. Identifying these pins can be crucial for security researchers, penetration testers, and hardware enthusiasts. In this article, we’ll explore JTAGenum, a powerful tool that helps us discover JTAG pins in unknown chips using an Arduino.
Why Choose JTAGenum?
- Cost-Effective: Arduinos are affordable, making JTAGenum a budget-friendly option.

- Functionality:
- JTAGenum scans pins on an Arduino-compatible microcontroller.
- Identifies basic JTAG functionality.
- Orders pins correctly for effective analysis.
- Ease of Use:
- Built with simplicity in mind.
- Load the INO code into the Arduino IDE.
- Connect the ground and hook up digital pins 2-11.
- Serial Communication:
- Run JTAGenum easily.
- Explore results by opening a serial window in Arduino or using a tool like screen.
Router’s Hardware Architecture
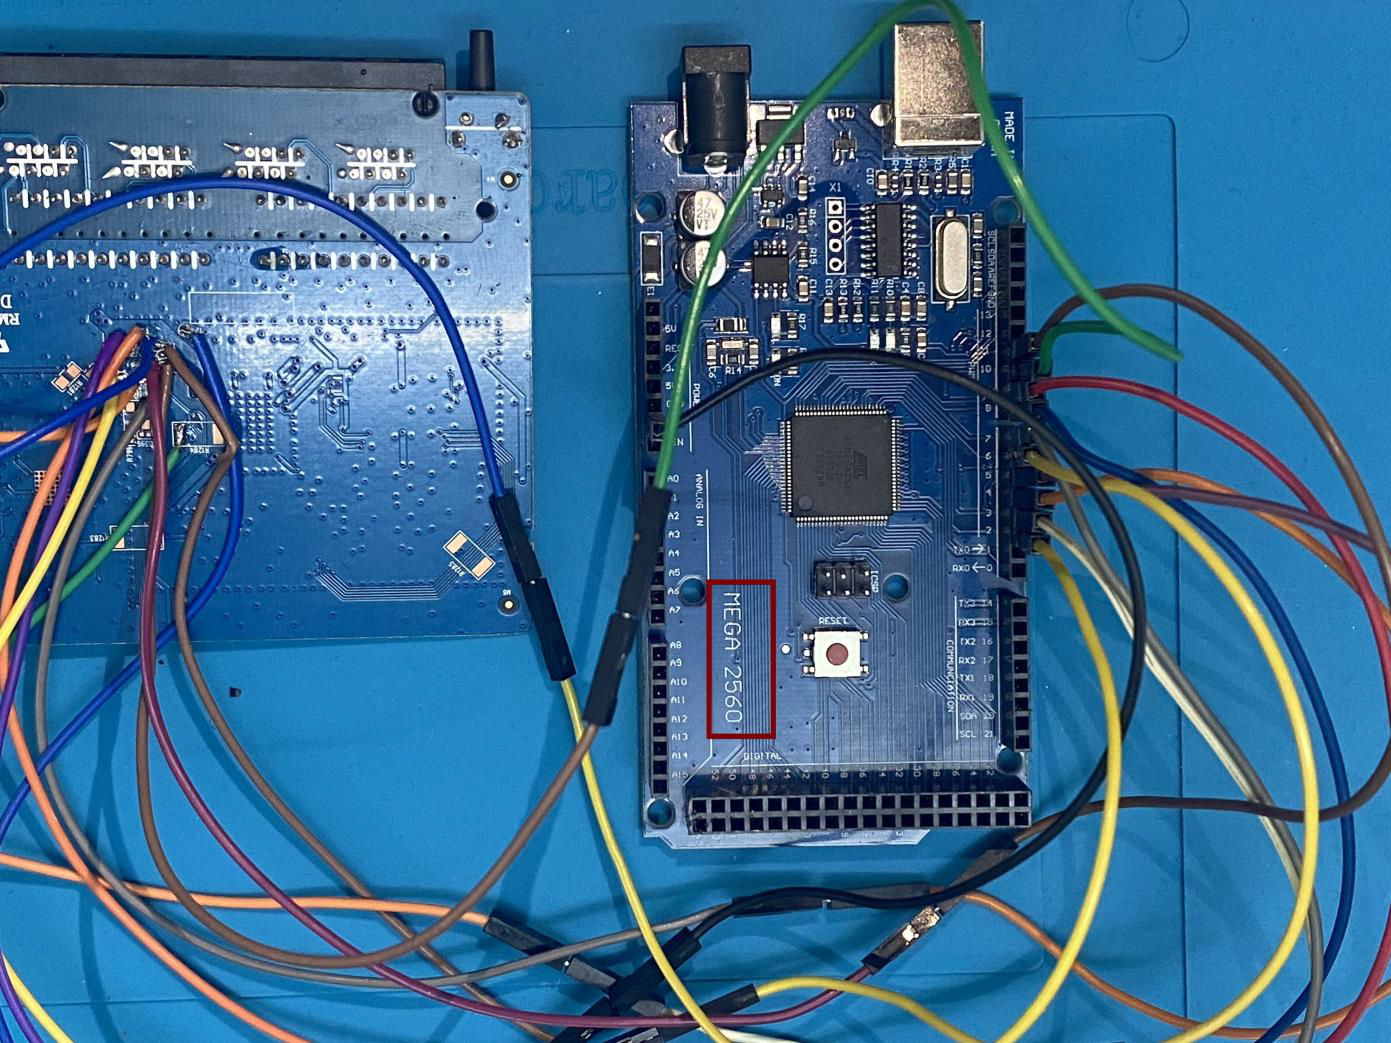
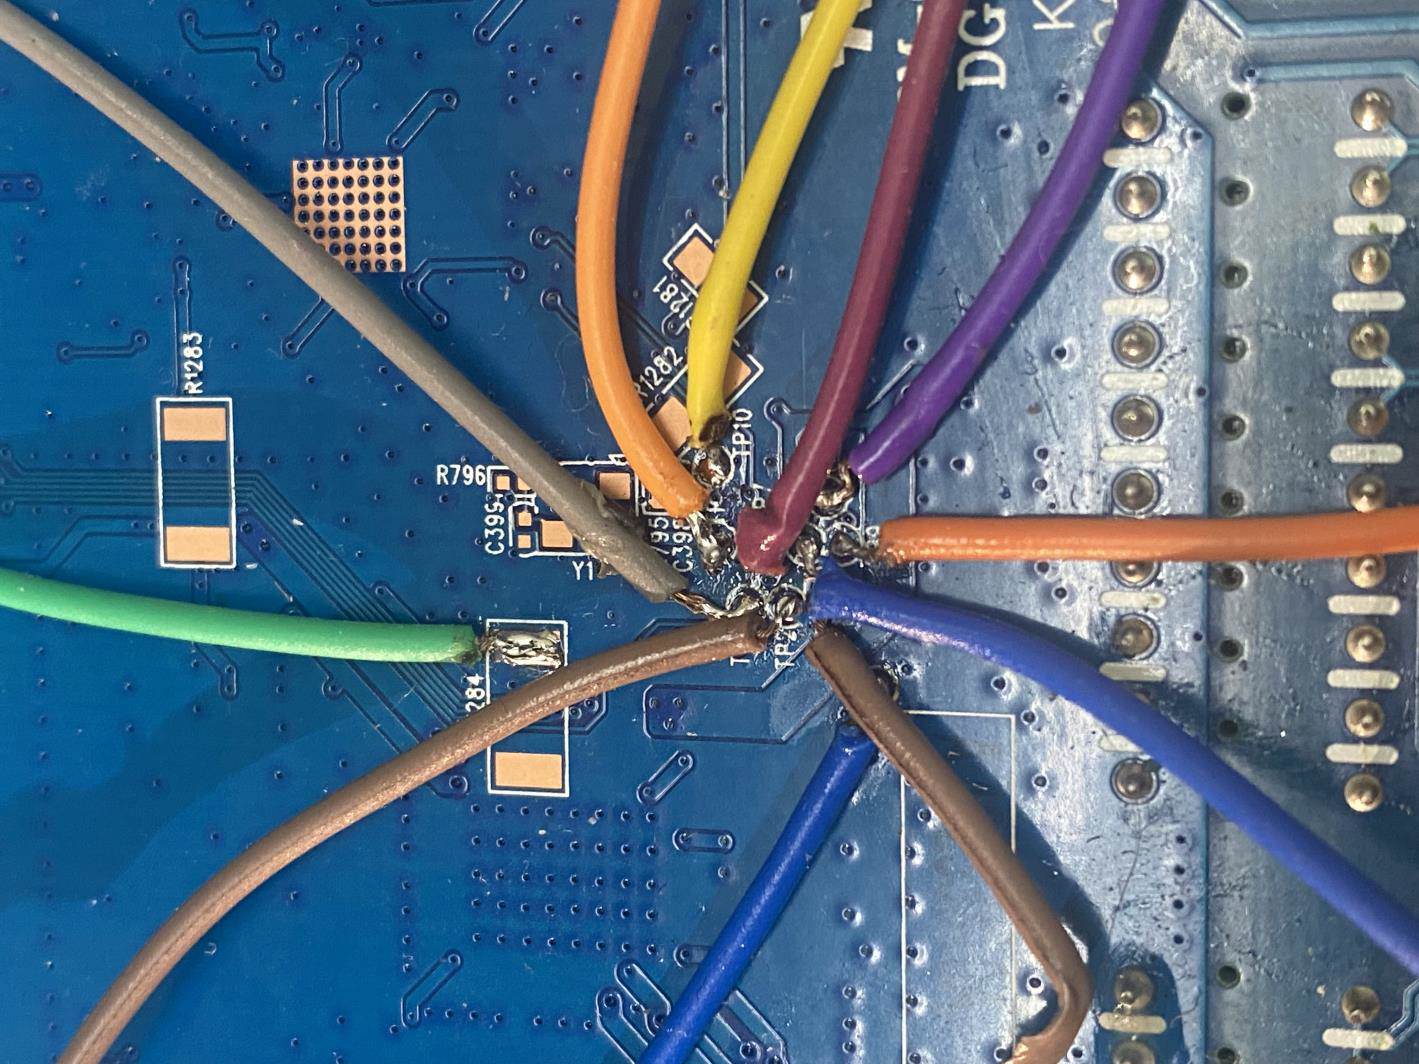
Within the router’s hardware architecture, there are 10 test pins of unknown functionality, accompanied by a solitary ground pin. The subsequent phase involves a methodical and technical approach to unveil the specific characteristics and functions of these test pins. The exploration encompasses precision measurements using a multimeter to ascertain continuity and voltage characteristics. Additionally, advanced instrumentation, such as an oscilloscope, is deployed to analyse signal patterns on each pin, potentially revealing their respective data or test functionalities.
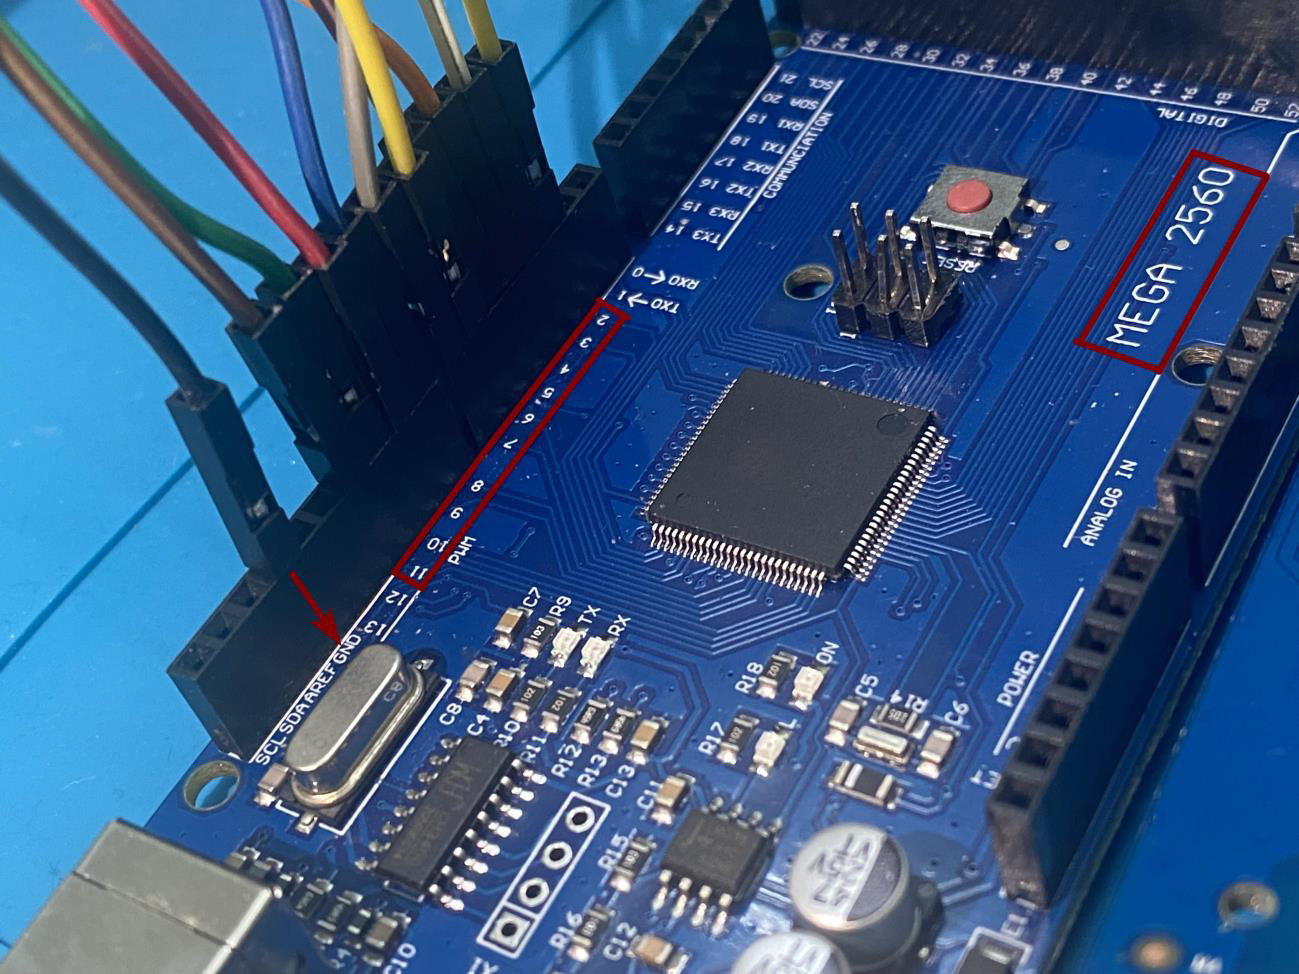
In the Arduino setup, establishing a connection involves linking specific pins on the Arduino board to JTAG pins, typically ranging from pin 2 to pin 11. Additionally, to ensure a stable reference, the Arduino ground (GND) is connected to the baseboard ground. This configuration establishes the necessary electrical connections, forming a crucial interface between the Arduino and the JTAG pins on the baseboard.
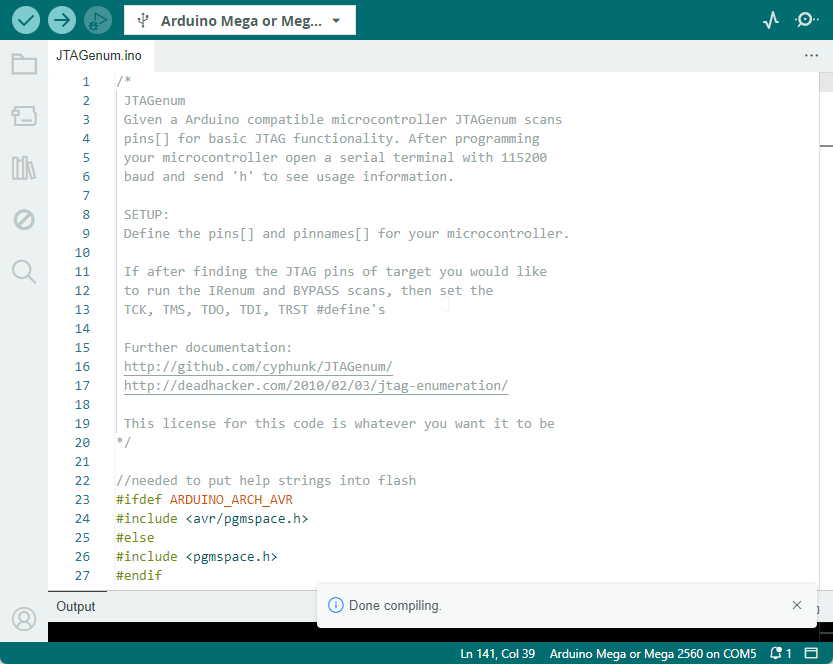
To load the JTAGenum program onto the Arduino and initiate communication through the Serial Monitor, follow these steps. After successfully uploading the JTAGenum program onto the Arduino board, open the Serial Monitor. Input the ‘h’ command, which serves as a command for help, and press enter. The Serial Monitor will then display the relevant help information. This interaction allows users to access and understand the available commands and functionalities provided by the JTAGenum program, facilitating a streamlined and user-friendly experience for exploring and identifying JTAG pins in connected devices.

Ensure a seamless communication setup by configuring the Serial Monitor with “No line ending” and a baud rate of 115200. This configuration optimizes the data transmission between the Arduino and the connected device. Following the setup, initiate the scanning process by sending the ‘s’ command through the Serial Monitor. The ‘s’ command serves as the trigger to commence the scanning procedure, allowing for the identification and exploration of JTAG pins in the connected hardware. This systematic configuration and command input enable a smooth and efficient interaction with the Arduino, enhancing the user’s ability to glean valuable insights during the scanning process.
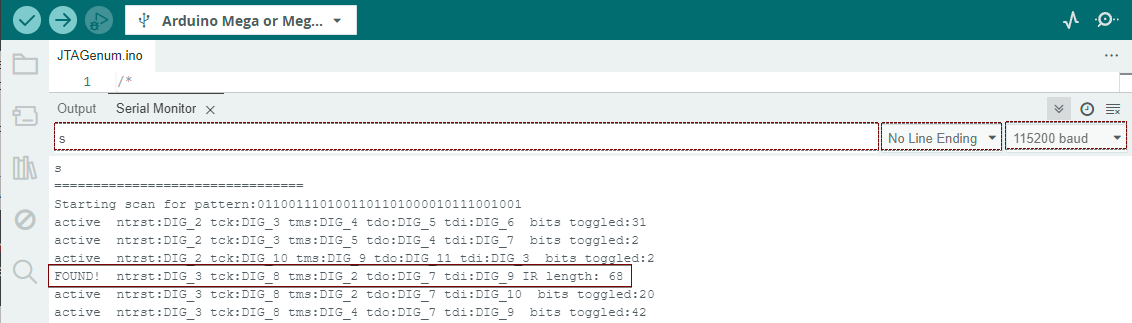
As we navigate the intricate terrain of JTAG interfacing, the Serial Monitor emerges as our steadfast companion. Its lines illuminate with the enchanting proclamation: “FOUND!” Each line unfurls a trove of insights into the identified JTAG pins. Let’s unravel a sample line together:

• Non-Trusted Reset (ntrst): Aligning with DIG_3, this pivotal pin serves as the gateway to device reset without trust. A master key to restarting the exploration.
• Test Clock (tck): Nestled at DIG_8, this clock pulses through our journey, synchronizing every step with precision. It’s the heartbeat of our exploration.
• Test Mode Select (tms): Anchored at DIG_2, it acts as our compass, guiding us through the dynamic landscapes of JTAG states. A reliable guide through the intricate journey.
• Test Data Output (tdo): Emerging from DIG_7, this pin carries secrets within its currents. Bits of truth and mystery flow, revealing the essence of our exploration.
• Test Data Input (tdi): Gracefully flowing through DIG_9, it serves as our bridge to the chip’s core. Our whispers reach the heart of the device, influencing its every beat.
In the subtle details, the “IR length” quietly stands at 68 bits—a testament to the complexity and depth of the instruction register. As we conclude this exploration, the fine print echoes the profound nature of our journey through the realms of JTAG interfacing.
TL;DR
In this blog, we explored the JTAGenum technique, employing Arduino to unveil hidden JTAG pins. By leveraging this method, researchers and enthusiasts can effectively identify and access JTAG interfaces on devices. The versatility of Arduino in this context highlights its potential for hardware exploration and penetration testing. As technology evolves, continuous innovation and exploration of such techniques contribute to the broader understanding of hardware security. As always, responsible and ethical usage of these methods is paramount in ensuring the integrity of security research and practice.
Redfox Security is a diverse network of expert security consultants with a global mindset and a collaborative culture. If you are looking to improve your organization’s security posture, contact us today to discuss your security testing needs. Our team of security professionals can help you identify vulnerabilities and weaknesses in your systems and provide recommendations to remediate them.
“Join us on our journey of growth and development by signing up for our comprehensive courses.”