
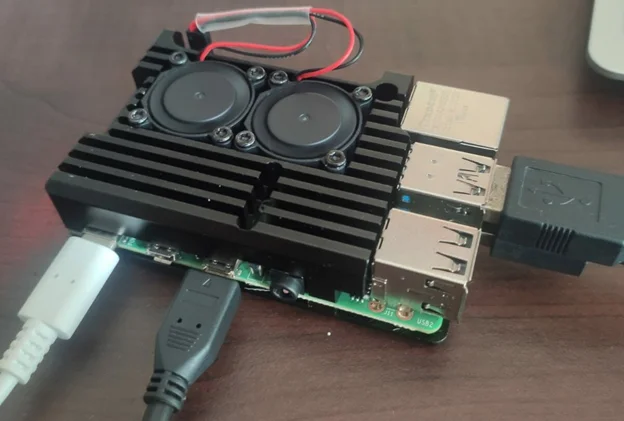
There are situations where On-site penetration testing is not always feasible. It’s better to go for a remote “pentest dropbox” in such cases. The pentest dropbox, in this context, is a Raspberry Pi 4 which is shipped to a remote customer/client. The client will either connect the dropbox to an ethernet port or set the dropbox in range of a Wi-Fi network, and the dropbox will automatically connect to a server hosted on the cloud which we control. We are going to look at how to setup such an environment.
We need a micro-HDMI cable to hook up the pi to a monitor and interface with it. Using SSH is another way of interfacing with the Pi if a micro-HDMI is not available, but here we are proceeding with the first method. Since the requirement of a dropbox is to set up a connection automatically, we must configure it so. If the client is utilizing Wi-Fi and if it’s difficult to connect the dropbox to the internal network via ethernet, then we have to setup automatic Wi-Fi connection. Once the Pi connects via Wi-Fi, we can use OpenVPN client to tunnel back to our cloud server. We can run an RDP server on the dropbox as well if we need GUI access. The setup process is divided into 4 parts for ease of readability.
Step 1: Creating wpa_supplicant.conf file.
After logging into Kali Linux on the Pi with the default creds kali:kali, run `sudo su` to get a shell as root. Now create a new file with the name wpa_supplicant.conf with the following lines.
Note: Replace country code, SSID name and password with the relevant values.
					ctrl_interface=DIR=/var/run/wpa_supplicant GROUP=netdev
country=IN
update_config=1
network={
                   ssid=”SSID_NAME”
                   psk=”Wifi_Password”
}
After editing the file, move it to /etc/wpa_supplicant/wpa_supplicant.conf.
Step 2: Editing /etc/network/interfaces file.
Now, we need to edit the interfaces file located in /etc/network/ directory. Before we make changes to this file, we need to find out the name of our wireless interface. By default, the wireless interface is wlan0 on Kali Linux loaded on Raspberry Pi 4. To check wireless interfaces, run the command iwconfig. Now that we know our wireless interface, we can modify the interfaces file with the following lines.
					source-directory /etc/network/interfaces.d
auto lo
iface lo inet loopback
auto wlan0
allow-hotplug wlan0
iface wlan0 inet dhcp
wpa-conf /etc/wpa_supplicant/wpa_supplicant.conf
wireless-power off
iface default inet dhcp
After editing this file, our raspberry pi should automatically connect to the Wi-Fi AP we have specified in wpa_supplicant.conf file during boot. We can verify this now by forgetting the current Wi-Fi network, rebooting our raspberry pi and checking network connectivity.
On completing the Wi-Fi autoconnection step, we can move towards setting up an OpenVPN connection. To do this, we need to start our Amazon EC2 ubuntu instance (free tier) and SSH into it.
Step 1: Setting up the OpenVPN server.
There is a public shell script which we can use to setup our OpenVPN server on ubuntu. We can download it to our Ubuntu machine using the following wget command.
wget https://git.io/vpn -O openvpn-install.sh
Now, we need to allow executable permissions for this script using chmod.
chmod +x ./openvpn-install.sh
Step 2: Running openvpn-install.sh script
We can run the script to setup our OpenVPN server:
./openvpn-install.sh
Multiple prompts appear during the installation process. Use UDP protocol (Option 1) for OpenVPN. Set the port to 1194 which is the default port. Also set the DNS server for the clients to the preferred one (We will be using option 3 which is 1.1.1.1 for demonstration). Next, enter the client’s name (We are going to name this raspberry_box). Now we can proceed with the installation and the final client ovpn file is generated in the home directory.
Step 3: Create another client conf and copy both conf to respective destination.
We need to create one more client ovpn file for our attack machine. To do this, we need to run openvpn-install.sh again and select option 1 to add a new client. We are going to provide the name as attack_box.
Once both ovpn files have been generated, we have to copy the raspberry_box.ovpn to our Pi and attack_box.ovpn to our attack machine. We can use scp to do this. Also, copy the two ovpn files to the home directory of the ubuntu user.
On our Raspberry Pi:
scp -i cloud_server_key ubuntu@cloud_server_hostname:~/raspberry_box.ovpn ./
On our attack box:
scp -i cloud_server_key ubuntu@cloud_server_hostname:~/attack_box.ovpn ./
Step 4: Testing OpenVPN connection.
Now that the keys have been copied, we can try connecting to our OpenVPN server using the following command as root.
openvpn raspberry_box.ovpn
If everything goes well, we should have a connection in a few moments. We can try testing the connection on the attack machine as well.
openvpn attack_box.ovpn
Step 5: Automating OpenVPN connection on boot.
For our Pi to work as a dropbox, we need to automate this OpenVPN connection on boot as well.
Firstly, we need to copy the raspberry_box.ovpn file to /etc/openvpn/openvpn.conf:
cp ./raspberry_box.ovpn /etc/openvpn/openvpn.conf
Also, we need to enable openvpn using systemctl to autostart on boot on the Pi.
systemctl enable openvpn
To check if it’s working properly, we can try rebooting the Pi using the “reboot” command. Once the raspberry boots up, we can run “ip a” command to see the list of interfaces. “tun0” should be up now as the Pi connects to the OpenVPN server. Take a note of the tun0 IP address, as we will require it later.
For GUI access over the OpenVPN tunnel, we can setup an xrdp server on the pentest dropbox using the following sets of commands as root.
Step 1: Install xrdp on the pentest dropbox.
To install xrdp on Debian:
apt install xrdp
Step 2: Starting the xrdp service.
After installation, start the xrdp service with the commands below:
					service xrdp start
service xrdp-sesman start
Step 3: Automating xrdp startup on boot.
To start xrdp server automatically on boot, we can use systemctl.
systemctl enable xrdp
So far, we have configured the Raspberry Pi to auto-connect to a specific Wi-Fi network of our choice, connect to our cloud server, setup an OpenVPN tunnel, and start an xrdp server all without any user interaction, which is specifically the purpose of a dropbox.
Now that finally everything is setup, we’ll try it out and verify the setup.
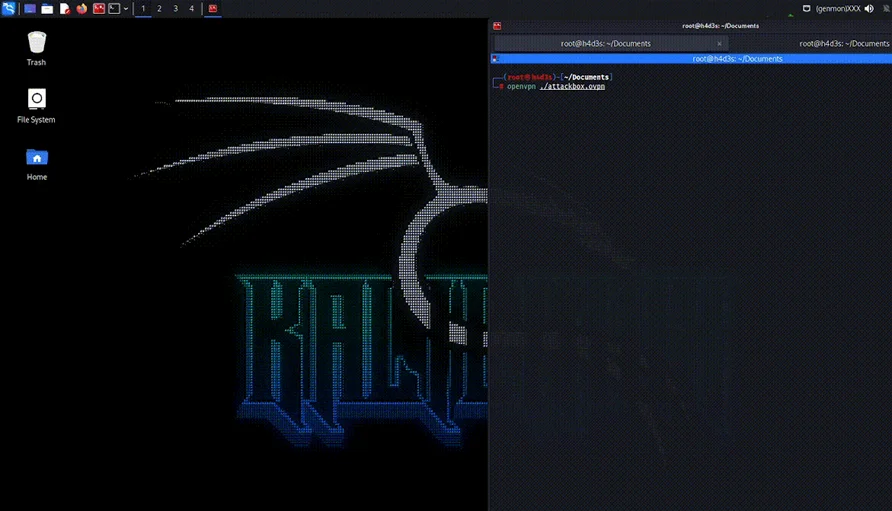
First, we are going to reboot the raspberry pi. From our attack Kali Linux machine, we’ll run the following command:
openvpn ./attack_box.ovpn
Now we can use xfreerdp on the attack machine to connect to the dropbox using the command:
xfreerdp -wallpaper +clipboard /cert-ignore /v:IP_address /dynamic-resolution
A secure communication channel between the pentest dropbox and our attack-box has been successfully established. Instead of RDP, we could also try using SSH instead, especially when the network communication channel is less stable. In addition to pentesting, dropboxes can also be used by red-teamers or malicious perpetrators after a physical breach as an initial foothold in the environment. Here, the Raspberry Pi must be well hidden and should blend in with other networking equipment.
In this blog, we talked about what a dropbox is and how to set it up using a Raspberry Pi 4. We’ll be covering other cool uses of the Pi 4 in upcoming blogs. Stay connected with Redfox Security for more info on anything Cybersecurity.
By partnering with Redfox Security, you’ll get the best security and technical skills required to execute an effective and thorough penetration test. Our offensive security experts have years of experience assisting organizations in protecting their digital assets through penetration testing services. To schedule a call with one of our technical specialists, call 1-800-917-0850 now.
Redfox Security is a diverse network of expert security consultants with a global mindset and a collaborative culture. With a combination of data-driven, research-based, and manual testing methodologies, we proudly deliver robust security solutions.
“Join us on our journey of growth and development by signing up for our comprehensive courses, if you want to excel in the field of cybersecurity.”


Redfox Cyber Security Inc.
8 The Green, Ste. A, Dover,
Delaware 19901,
United States.
info@redfoxsec.com
©️2024 Redfox Cyber Security Inc. All rights reserved.